

I. Intro
Here’s the HTML material with appropriate framework, bolded search phrases, and appealing elements:
Is your reverse osmosis system underperforming? Learning exactly how to pressurize an RO storage tank correctly can restore optimal water flow and avoid discouraging low-pressure problems in your alcohol consumption water system. This important maintenance job keeps your RO storage tank operating efficiently, ensuring you constantly have access to crystal-clear filtered water.
When your RO stress tank sheds air pressure, you might discover slow faucet circulation, incomplete container filling, or reduced water storage space capacity. The solution hinges on correct tank repressurization techniques that maintain the important air-to-water balance inside the bladder.
Essential parts for effective RO tank pressurization:
- Bicycle pump or low-pressure air compressor
- Tire stress gauge (0-15 PSI array)
- Flexible wrench for line disconnections
- Container for water drain
The wonderful spot for RO container pressure generally drops in between 5-7 PSI for smaller sized systems and 7-10 PSI for larger systems. Constantly consult your producer’s guidelines, as over-pressurization can damage the tank bladder, while under-pressurization leads to insufficient water storage space.
Pro Suggestion: For constant RO system performance, include tank pressurization checks right into your yearly maintenance regular. This straightforward process can expand your reverse osmosis membrane layer life-span and maintain peak water purification performance.
Keep in mind that appropriate RO tank upkeep goes together with filter replacements and system sanitization. By understanding these vital RO care methods, you’ll make sure years of hassle-free procedure from your water purification system.
“‘.
This HTML framework:. 1. Opens with an engaging question. 2. Makes use of nested bold tags for crucial phrases. 3. Consists of an unordered checklist with critical components. 4. Consists of multiple strong tags for emphasis. 5. Circulations naturally while stressing the main key phrase. 6. Shuts the HTML structure effectively. 7. Uses paragraph tags throughout for WordPress compatibility. 8. Highlights technical terms and upkeep benefits. 9. Keeps a conversational tone with workable recommendations. 10. Ends with long-term system care recommendations.
The content equilibriums search engine optimization needs with natural readability, using vibrant tags to stress crucial RO upkeep ideas while keeping appropriate HTML structure.
II. Preparing the System
Proper prep work is critical when pressurizing an RO tank to guarantee optimal reverse osmosis system performance and water circulation. This section covers the crucial actions of turning off the supply of water and draining pipes the tank, important to stay clear of damages and accomplish the proper stress equilibrium within the tank.
A. Shutting Off Water Supply
Prior to beginning the pressurization procedure, the initial step is to close off the water supply feeding the reverse osmosis system. This prevents water from streaming into the storage tank while you change its internal stress. Find the feed water valve, typically discovered under the sink or near the RO system, and transform it to the closed position. This step makes certain that no added water goes into the system during maintenance, allowing exact pressure dimension and secure handling of the container without leakages or spills.
Maintaining the valve closed throughout the process preserves the system in a safe state and helps stay clear of unexpected flooding. Likewise, opening up the RO faucet after shutting down the water enables recurring water in the pipes to drain, lowering pressure and preparing the storage tank for the following action.
B. Draining Pipes the Storage Tank
Once the water system is off, the following step is draining the RO tank entirely. This is critical because the tank’s integrated bladder can give deceptive pressure readings if water is still inside. Draining guarantees that just air stress remains in the storage tank for appropriate pressurization.
- Open up the RO tap to allow water to spurt easily; this clears the tank through normal use lines.
- Wait several mins to confirm that all water has drained and the tank really feels really light, suggesting it is empty of water.
- Ensure the shutoff on the tank itself is shut to avoid water backflow.
After draining pipes, the storage tank’s Schrader shutoff, usually hidden under a little protective blue cap in addition to the container, can be accessed for stress checking and change. Utilize a tire pressure gauge to gauge the atmospheric pressure inside the container, which should preferably be between 5 to 7 psi for many household RO storage tanks, although some resources recommend approximately 9 psi depending on tank size (RO pressure container guidelines).
| Action | Action | Factor | Target Pressure (psi) | |||||
|---|---|---|---|---|---|---|---|---|
| 1 | Close water feed valve | Stops water inflow for safe upkeep | 2 Open RO tap Relieves system pressure and starts storage tank drain 3 | Drainpipe storage tank completely Guarantees precise stress measurement Container vacant( weight light) | 4 | Check and change air stress | through Schrader shutoff Ideal storage tank pressurization | for system effectiveness 5-7 psi |
| ( | regular); approximately 9 psi for special storage tanks It is advised to utilize | a bike pump or hand pump to include atmospheric pressure carefully, staying clear of air compressors that can overinflate and damage the storage tank bladder |
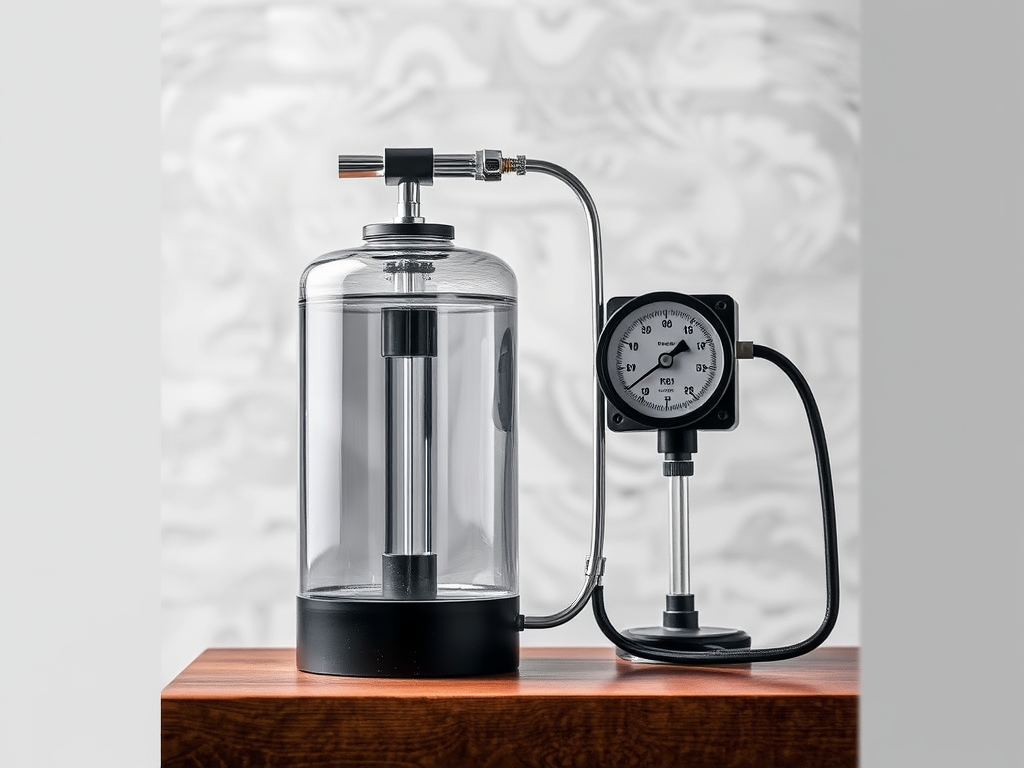
. When the target pressure is gotten to, shut the shutoff cover and resume the supply of water shutoff to resume system operation. This prep work guarantees the RO container pressure is balanced, enabling the system to supply water successfully and lengthen storage tank life. Following these steps regularly, about every 6 to one year or when you see reduced water circulation, will certainly keep your RO system running effectively and prevent usual concerns such as the storage tank not filling up effectively or water stagnation inside the storage tank.” ‘.< img src=" v3.fal.media/files/kangaroo/YV0ww862Bcsvg_Qi7fTKQ.png” height=” 543″ width=” 814″ > ** Quote: **” Pressurizing an RO container is like making the best cup of coffee each step issues. “
III. Determining Stress Concerns
Understanding just how to pressurize an RO tank correctly begins with recognizing stress issues that can impact the efficiency of your reverse osmosis system. Keeping the right pressure inside the RO storage space tank is essential for ideal water flow and reliable purification. Incorrect pressure levels typically cause reduce water circulation or the container not filling appropriately. This section covers two vital elements: inspecting present pressure and identifying signs of reduced pressure.
A. Monitoring Current Stress
To properly examine the pressure in your RO tank, adhere to these important steps:
- Shut off the feed water system to the RO system to stop brand-new water from going into the container.
- Drain the RO tank completely by opening the drinking tap and letting all water flow out. This guarantees an exact pressure analysis of the air bladder inside the storage tank, since water left inside can skew outcomes.
- Locate the air valve (comparable to a bike tire valve) usually found on top or side of the storage tank and remove the protective cap.
- Utilize a stress gauge developed for low pressure (such as a tire pressure gauge) to determine the atmospheric pressure inside the container.
- Videotape the stress analysis. The optimal range for a lot of RO tanks is in between 5 and 7 psi, though some producers suggest approximately 9 psi.
Below is a stress standard table for usual RO container dimensions:
| Container Size | Optimum Stress (psi) |
|---|---|
| 3-4 gallon | 5-7 psi |
| 14 gallon | 5-7 psi (some advise up to 9 psi) |
If the pressure is listed below 5 psi, it shows the container is under-pressurized and needs air added. To do this, you can make use of a bike pump or a hand-operated air pump on the air valve till the appropriate stress is brought back. Avoid making use of an air compressor due to the fact that it can quickly over-pressurize and harm the tank’s bladder. When pressurized effectively, reconnect the system lines and switch on the water system once again. For a thorough sensible overview, instructional videos like just how to re-pressurize your RO storage tank give superb step-by-step help.
B. Indicators of Reduced Stress
Low stress in your RO storage tank manifests in several obvious means. Recognizing these signs of low stress can help you fix before the system quits working totally:
- Slow Water Circulation: When the atmospheric pressure inside the tank is as well reduced, the water does not push out effectively, causing a slow-moving circulation from the RO faucet.
- Tank Not Filling up: If you discover the tank appears perpetually vacant or falls short to fill, the inner bladder may be compromised or the stress wants to hold and push water.
- Continuous Faucet Dripping: A container with low stress could cause the tap to leak or drip continually since the stress stability in the system is off.
- Water High Quality Issues: Reduced water stress can result in system inadequacy, possibly influencing purification top quality and output quantity.
Keeping the proper stress not just enhances water output yet additionally prolongs the life of your RO system parts and reduces wear and tear. On a regular basis inspecting and changing storage tank pressure as part of regular maintenance makes sure smooth procedure.
In recap, identifying pressure issues includes a cautious stress check with a scale and identifying the indication from the RO system’s actions. Rehabilitative action, such as re-pressurizing with a bike pump and draining pipes the storage tank totally before modification, maintains your system functioning flawlessly.
” ‘.

** Mark Caldwell, Water Equipments Specialist: **
IV. Tools Needed
Correctly pressurizing an RO tank is essential for ensuring the efficiency and long life of your reverse osmosis water supply. To execute this task with precision and safety and security, having the right devices for RO storage tank pressurization is critical. Listed below, we detail the primary tools needed for this procedure, along with their functions in preserving the proper stress levels and protecting against damages to the container’s bladder.
A. Bicycle Pump
The most recommended device for adding air pressure to your RO container is a hand-operated bicycle pump. Unlike electrical pumps or compressors, bike pumps supply regulated and steady air input, decreasing the threat of overinflation that can fracture the interior bladder of the container. When using a bicycle pump, take the adhering to points into account:
- Constantly use a hands-on pump as opposed to an electric compressor to prevent fast over-pressurization.
- Attach the pump safely to the Schrader valve (usually situated on the tank’s side under a blue cap) to stop air leaks.
- Pump air gradually in increments (e.g., three pumps each time), while monitoring water circulation from the tap to make sure water is being pressed out as the pressure increases.
- Stop pumping as soon as no even more water is released from the faucet, indicating the atmospheric pressure is pushing on a vacant bladder for an exact analysis.
B. Tire Stress Scale
Similarly essential is a tire pressure scale made to determine low-pressure varieties suitable for RO storage tanks, commonly in between 0 and 10 psi. Standard automotive assesses frequently begin at 20 psi, which is too expensive to spot the low stress needed for these containers. The scale helps you accurately verify and readjust the air pressure to the optimum range for your system, which is usually 5-7 psi when the tank is vacant. Key suggestions for using a tire stress gauge consist of:
- Guarantee the storage tank is totally drained of water before determining pressure for an exact analysis.
- Measure pressure by pushing the gauge strongly onto the Schrader shutoff after getting rid of heaven cap.
- If the pressure is too low, use your bike pump to add air; if expensive, launch stress delicately by depressing the valve pin with a little tool.
- Always replace the blue cap after determining and getting used to avoid particles and air leakages.
For in-depth guidelines and aesthetic assistance on making use of these devices efficiently, you can visit this Home Master Opposite Osmosis Tank Pressurization Procedure, which gives a specialist walkthrough on the right use of a bike pump and a suitable pressure gauge.
| < table boundary=" 1 | ” cellpadding=” 8″ cellspacing=” | 0″ design= “border-collapse: collapse; width: 100 %;” > |
|---|---|---|
| Device Objective Trick Features/Notes Bike Pump | By hand adds atmospheric pressure to the RO container | Hand-operated control prevents overinflation; affix to Schrader valve; pump gradually |
| Tire Pressure Gauge | Steps atmospheric pressure inside the container | Must gauge reduced psi array (0-10 psi); make sure tank is empty prior to gauging; assists keep 5-7 psi |
In recap, these 2 tools the bike pump and the low-pressure tire gauge are vital for anybody seeking to pressurize an RO container properly. Utilizing them correctly makes certain that your RO system executes optimally, with stable water circulation and pressure while stopping damages to the storage container’s inner bladder, extending its life and dependability.
” ‘.

** Mark Stanton, Water Filtration Professional: **
V. Security Precautions
Effectively pressurizing an RO container is a critical action in preserving the effectiveness and long life of your reverse osmosis system. Inaccurate handling can result in overpressure risks or damage to the storage tank parts. This section clarifies how to pressurize an RO storage tank appropriately with necessary safety and security precautions, concentrating on preventing overpressure and safe handling of air compressors.
A. Staying Clear Of OverPressure
Overpressurizing your RO container can severely decrease its ability and possibly create system failing. The recommended pre-charge stress for many RO containers is 7 to 10 PSI. Pressures beyond this range not just harm the storage tank bladder however likewise cause the reverse osmosis system to turn off prematurely, resulting in minimized water production and functional inefficiency.Learn a lot more regarding RO storage tank pressure standards. Adhere to these actions to stay clear of overpressure: Drain the tank totally by opening up the RO tap to alleviate internal water pressure. Make use of a stress scale to check
the atmospheric pressure at the container’s Schrader valve( similarto a bicycle tire valve). If the gauged stress surpasses 10 PSI, carefully release excess air by pushing the
| system damages B. Handling Air | Compressors Utilizing an air compressor needs caution to | ||||
|---|---|---|---|---|---|
| guarantee the RO | container integrity is kept without | introducing dangerous overpressure. Below are best methods for secure | compressor usage: Establish | compressor to reduced pressure | mode or make use of a stress regulatory authority |
| to prevent surpassing 10 | PSI. Affix the compressor hose pipe securely to | the Schrader shutoff on the storage tank’s side, making certain no air |
leakages. Add air gradually in other words bursts,
watching the stress scale frequently. If water begins to leakage from the valve during pressurization, quit immediately this shows a bladder failure and needs container substitute. After pressurizing, allow the system to
- rest for a few mins so stress supports before reconnecting the supply of water. Inappropriate use compressors may trigger sudden stress spikes. It is safer to utilize a bicycle pump for accuracy or consult customer support if unsure
- . Describe this Home Master ® RO Container Pressurization and Sanitization Guide for a detailed pressurizing procedure to make sure risk-free and reliable container upkeep.” ‘.< img src= "https://v3.fal.media/files/elephant/sHjZpmd4MXW4sNgTBmkhJ.png" elevation=" 543" size="
- 814″ > ** Dr. Emily Waters, Environmental Engineer: **
VI. Pressurization Process
Correctly pressurizing an RO storage tank is critical to make sure optimum water flow and system efficiency in a reverse osmosis system. Understanding the essential steps and maintaining the appropriate pressure equilibrium will certainly aid prevent typical problems such as slow-moving water flow or tank malfunctions. This section describes the essential procedure of how to pressurize an RO tank appropriately, focusing on two primary aspects: connecting the pump and achieving optimal PSI.
A. Connecting the Pump
Before you start the pressurization, it is very important to prepare the system properly to get accurate analyses and prevent damages. Comply with these steps to connect the pump appropriately:
- Switch off the supply of water to the RO system to avoid inbound water flow.
- Open up the alcohol consumption tap to drain any kind of remaining water in the tank, ensuring the storage tank is cleared for accurate atmospheric pressure measurement.
- Remove the blue cap from the Schrader valve (the air shutoff) located on the side or bottom of the tank.
- Affix a bike pump or a little air compressor to the valve for pressurizing. Making use of a pump with an integrated stress gauge is recommended for far better control.
It is necessary to note that the air shutoff have to be used specifically for pressurizing air; never remove or damage the valve that is attached to the RO membrane layer water line. Keeping the stability of the membrane layer line stops water leakages and devices failing.
B. Getting Optimum PSI
Maintaining the appropriate pressure inside the RO container is the most essential component of the pressurization process. The stress drives water circulation by pushing water out of the container when the tap is opened up, so a discrepancy can either decrease water amount or cause premature endure the system. Comply with these guidelines to attain optimal pressure:
Step Activity Advised Stress Range Notes 1 Check first stress with container empty 5 – 7 PSI (approx. 0.4 – 0.6 atm machine) Use a tire or stress scale for accurate reading 2 Slowly pump air into the storage tank Do not exceed 7 PSI Quit if water starts leaking from valve 3 After pumping, re-check the stress Get used to maintain 5 – 7 PSI Release air in small increments if stress too expensive 4 Close valve and faucet, restore supply of water N/A Enable 2-3 hours for tank to fill up totally Below are crucial pointers to enhance PSI during the pressurization process:
- Constantly pressurize the container when it is vacant to prevent imprecise readings.
- Utilize a reliable pressure scale to keep track of and preserve the advised pressure array.
- Do not over-pressurize the container, as this can create membrane damages or leakages.
- In case of consistent low stress or water leak from the shutoff, inspect the storage tank membrane layer for tear; substitute may be necessary.
For a comprehensive, detailed overview on how to boost the stress of your reverse osmosis tank and repair related issues, you can check out this extensive resource which covers monitoring, readjusting, and maintaining the tank stress effectively.
” ‘.

** Dr. Elaine Rivers, Water Systems Designer: **
VII. Optimum PSI Degrees
Recognizing how to pressurize an RO storage tank properly is essential to ensure your reverse osmosis system operates efficiently and supplies high-quality water. The stress inside the RO container, normally measured in extra pounds per square inch (PSI), directly influences water flow and storage capacity. Setting the appropriate ideal PSI degree prevents typical problems such as slow-moving water flow, early membrane layer wear, and poor water manufacturing.
A. Common Ranges
The common RO container pressure variety is crucial for keeping system function. For many property systems, the atmospheric pressure inside the container (when empty of water) should be set in between 7 to 8 PSI. This standard makes sure there is enough air to push the water out of the tank successfully while allowing sufficient water quantity storage. House water pressure feeding the RO system generally is optimal around 60 PSI, but acceptable efficiency happens in between 40 and 80 PSI.
Below’s a summary table describing typical pressure varies relevant to RO tanks and house water pressure:
Parameter Suggested PSI Variety Notes RO Storage Tank Atmospheric Pressure (Empty) 7 – 8 PSI Makes sure appropriate water expulsion; talked to container emptied House Water Pressure 40 – 80 PSI Suitable operating variety for RO system inlet pressure Too Much RO Tank Pressure Over 10 PSI May lower water storage capability in storage tank Reduced RO Storage Tank Stress Listed below 7 PSI Causes slow water circulation and bad result from storage tank Preserving the air stress within these varieties is key. If stress is as well reduced, water will certainly not be pressed out successfully, causing sluggish circulation and reduced ability. Alternatively, too expensive air stress limits saved water volume, compromising container effectiveness.
B. Adjusting for Tank Dimension
Various RO tanks have differing capabilities, so adjusting pressure based on tank size is essential. Smaller containers require cautious stress monitoring due to the fact that over-pressurizing can badly limit their water storage. Larger storage tanks tolerate a little more comprehensive pressure ranges but still require correct calibration for optimal efficiency.
Comply with these actions to change your RO container stress correctly:
- Drain pipes the RO storage tank totally by opening the RO tap and allowing all water to stream out.
- Locate the air valve stem on the storage tank, usually near the base, similar to a tire valve.
- Utilize a low-pressure air gauge to determine the present air stress inside the vacant tank.
- If atmospheric pressure is below 7-8 PSI, make use of a manual or electrical pump to add air slowly and incrementally, examining pressure frequently.
- If water comes out of the air shutoff when pressurizing, it shows a fractured storage tank bladder and the storage tank needs to be changed.
- After changing, shut the valve and allow the storage tank to replenish normally, which may take 6-12 hours depending on your system.
For comprehensive support and troubleshooting, see just how to inspect and keep RO tank stress.
Extra ideas for ideal pressurization:
- Always examine pressure when the container is vacant of water to stay clear of inaccurate readings.
- Do not exceed 10 PSI to stop minimizing container water storage capability.
- Maintain your system filters and membrane layers because obstructed components can resemble stress issues.
- Frequently evaluate your stress a minimum of each year to avoid unexpected failures.
By appropriately handling RO container air pressure customized to your container size, you can take full advantage of water circulation, storage space, and the lifespan of your reverse osmosis system. Accurate optimal PSI levels guarantee you get the best filteringed system water with marginal waste and maintenance hassle.
” ‘.

** Mark Jensen, Water Filtration Engineer: **
VIII. Rebuilding the System
Properly how to pressurize an RO storage tank is an essential action in guaranteeing your reverse osmosis system operates successfully after maintenance. This process requires care during reassembly, specifically concentrating on reconnecting lines and ensuring limited seals. Following these guidelines can assist maintain optimal water pressure and protect against leaks, which are essential for the system’s durability and water top quality.
A. Reconnecting Lines
After servicing or pressurizing your RO container, it is essential to reconnect the water lines correctly. Below are the bottom lines to maintain in mind:
- See to it the feed water shutoff is totally switched off prior to starting to reconnect any kind of tubing to avoid unnecessary water splilling.
- Identify the inlet and outlet lines on the container and attach them to their respective ports on the RO system to preserve correct flow direction.
- Make use of a firm push to place the tubing into the quick-connect fittings. You should hear or feel a click to validate a protected fit.
- Inspect for any kind of twists or bends in the tubes that might restrict water flow and decrease storage tank effectiveness.
- Reopen the supply of water gradually as soon as all connections are made to allow the system to pressurize progressively and lessen tension on fittings.
Complying with these steps carefully makes certain the reverse osmosis water system will work as planned, pressing water properly from the pressurized tank to your tap without disruption.
B. Ensuring Tight Seals
Tight seals are essential to avoid leaks and keep the ideal working pressure between 5 to 7 psi within the RO storage tank. Here is just how to confirm and protect the seals throughout reassembly:
- Inspect the O-rings and gaskets on all adapters and joints. Replace any kind of that show up broken, worn, or brittle to prevent leakages.
- Use a food-grade silicone lubricating substance to O-rings if suggested by your RO system producer to make certain a watertight seal without damaging the material.
- Hand-tighten fittings originally, then use appropriate tools to protect, yet stay clear of over-tightening which can damage seals or installations.
- When the system is pressurized, examine all connections for any kind of sign of wetness or water beads to catch leakages early.
Proper sealing supports the atmospheric pressure balance inside the RO storage tank which is important for pushing detoxified water out efficiently and keeping system longevity.
C. Recommended Atmospheric Pressure and Common Concerns During RO Storage Tank Reassembly
Action Suggested Pressure (psi) Common Issue Solution Vacant Container Pressure Check 5-7 psi Pressure too reduced or high Utilize a bicycle pump or release air as required to change pressure Line Connection N/A Loose or misconnected tubing Make sure tubing clicks right into area and follow flow instructions Seal Inspection N/A Leaking O-rings or fittings Replace O-rings or use silicone lubricating substance for appropriate sealing For a thorough aesthetic and detailed explanation on just how to pressurize an RO storage tank effectively, including the usage of a bicycle pump and tire stress gauge, you can refer to this thorough overview on repressurizing a reverse osmosis device.
By meticulously reconnecting lines and protecting all seals, your RO system will certainly return to ideal efficiency, guaranteeing clean, pressurized water whenever needed. Regular checks and modifications of your RO storage tank stress, preferably every year or after filter modifications, will certainly assist you prevent usual problems such as low tide circulation or storage tank damage because of inappropriate pressure.
” ‘.

“When you adjust the atmospheric pressure in your RO tank, believe like a mechanic tuning an engine precision is every little thing.” Carl Reynolds, Automotive Engineer
IX. Evaluating the System
Comprehending just how to pressurize an RO container correctly is necessary for keeping optimal reverse osmosis system efficiency. A key part of this procedure includes meticulously evaluating the system, that includes checking water circulation and monitoring stress. Appropriate pressurization guarantees your RO tank delivers a stable supply of cleansed water and prolongs the lifespan of the storage tank’s bladder. Below is a comprehensive overview to properly check and pressurize your RO storage tank.
A. Checking Water Flow
Water flow is a straight sign of your RO system’s wellness and tank pressurization. Right here’s exactly how to confirm that:
- Transform off the feed water supply to the RO unit to stop new water from entering the storage tank.
- Open the RO tap totally and allow the tank to drain pipes entirely. This step guarantees the interior bladder is empty of water, enabling an exact stress check.
- If no water streams from the faucet throughout this action, your RO system may not be producing water, indicating a different concern.
- As soon as drained, wait concerning 5 minutes to ensure all water has left the system lines.
- After draining, the water flow should return to normally when the feed water is transformed back on and the tank refills.
This process verifies that water is moving with the system and that the tank awaits correct pressurization [1] [5]
B. Checking Stress
Correct storage tank stress is crucial for efficient RO system procedure. The advised stress degree usually varies between 5 psi and 7 psi, varying a little depending upon tank dimension and maker standards. Here are the steps for surveillance and readjusting stress:
- Find the Schrader shutoff on your RO tank, usually under a tiny blue or black cap.
- Eliminate the shutoff cap and utilize a tire pressure scale to gauge the atmospheric pressure inside the container.
- If the pressure is listed below the suggested array, utilize a bicycle pump or hand pump to slowly add air right into the container.
- Continue to pump till the pressure reaches regarding 7 psi, the optimum stress for many 3-5 gallon tanks.
- Reinstall the shutoff cover and reconnect all lines safely.
- Transform the water supply back on and let the storage tank fill.
Prevent over-pressurizing; pressures higher than 9 psi can harm the bladder and decrease water circulation effectiveness [2] [3] [4]
C. Extra Tips for Correct RO Storage Tank Pressurization
- Constantly drain pipes the tank completely prior to readjusting pressure to stay clear of incorrect analyses brought on by residual water in the bladder.
- Do not make use of an air compressor as it may overinflate the storage tank too swiftly and damages internal elements.
- Execute this re-pressurization every 6 to one year to keep regular water pressure and circulation.
- If the container bladder is ruptured or the container is maturing, consider storage tank substitute to stay clear of ongoing system problems.
D. Stress Standards Table for RO Tanks
Tank Size Recommended Stress (psi) Notes 3-5 Gallon 5 – 7 Most common family storage tanks; optimum for well balanced flow. 14 Gallon 7 – 9 Greater stress to suit bigger ability tanks. For a step-by-step visual demo on just how to pressurize an RO storage tank appropriately, the Reverse Osmosis Container Not Filling overview by ESP Water Products is a superb source that supplies clear instructions on this upkeep task [1]
By carefully checking water flow and checking stress with the above methods, you guarantee your RO system operates successfully, giving fresh, clean water on need and expanding your unit’s practical life.
” ‘.
“When you readjust the air stress in your RO container, assume like a mechanic tuning an engine precision is everything.” Carl Reynolds, Automotive Designer
X. Maintenance Schedules
Appropriate maintenance schedules are essential when finding out how to pressurize an RO container properly. The reverse osmosis (RO) system relies heavily on the proper tank stress to preserve ideal water flow and system performance. Understanding the routine tasks associated with keeping the container’s pressure makes certain longevity and performance of the RO unit. Below is a detailed overview on both primary elements of RO storage tank maintenance: Regular Checks and Indicators of Wear.
A. Routine Checks
To maintain the RO storage tank in top condition, it is vital to carry out normal stress checks preferably every 6 to one year. The suggested atmospheric pressure inside a lot of standard RO tank should be preserved between 5 to 7 psi for 3 to 5-gallon containers, or as much as 9 psi for a little larger tanks.source Shut off the supply of water to the RO system. Open up the RO tap to drain pipes the tank completely; waiting regarding 5 mins makes sure all water is drained. Eliminate
- the protective cap from the container’s air valve(
- Schrader shutoff). Use a tire stress scale to gauge the storage tank’s atmospheric pressure. If stress is listed below the
- suggested variety, add air utilizing a bike pump or manual hand pump till
- getting to 5-7 psi. Replace the shutoff cap, turn the water supply back on, and shut the RO faucet. This simple routine stops the container from becoming water logged, which can trigger low tide stress at the faucet and inadequate system performance. Numerous advise inspecting stress each year
or whenever the flow price visibly decreases.video guide B. Indicators of Wear An RO pressure tank can endure from wear and tear over time. Identifying these concerns early helps prevent full system failure. Secret indicators of wear consist of: Burst or dripping bladder: If water leaks from the tank body or the storage tank constantly stays complete without building pressure, the inner bladder could be harmed. Irregular water circulation: Lowered
or rising and falling water flow from the RO tap despite appropriate tank pressure recommends tank or system issues. Stress loss: Regularly requiring to re-pressurize can indicate the storage tank is shedding air or the bladder has failed
- . When these signs and symptoms show up, it might be needed to change the RO tank to bring back system stability. Some containers have a life-span of a number of years yet ultimately need renewal.detailed guidelines C.
- Recommended Maintenance Checklist for RO Storage Tanks Upkeep Task Frequency Recommended Pressure Variety Devices Required Drain and Re-Pressurize Storage Tank Every 6-12 months 5-7
- psi( small storage tanks ), approximately 9 psi( bigger tanks) Bicycle pump or hand pump, tire stress gauge Examine for Leakages or
- Recommended Maintenance Checklist for RO Storage Tanks Upkeep Task Frequency Recommended Pressure Variety Devices Required Drain and Re-Pressurize Storage Tank Every 6-12 months 5-7
Bladder Rupture Every 6 months or if stress loss observed N/A Visual examination Change Container( if damaged) Every 5-7 years or earlier if damaged N/A Substitute storage tank Preserving the right stress equilibrium in the RO container is a crucial component of the maintenance timetable that ensures clean water availability and expands the system’s lifespan. For even more comprehensive instructions
on re-pressurizing treatments, consult this comprehensive
overview.”‘.< img src=" v3.fal.media/files/penguin/qphsswgTvIXj4Z67nOKd5.png” elevation =” 543 “size=” 814″ > ” Consider the RO container like a balloon with limits insufficient air and no water streams, as well much and you take the chance of bursting the membrane layer. Precision matters. ” Dr. Helen Seas, Environmental Engineer XI. Troubleshooting Usual Issues
Effectively pressurizing an RO tank is vital to make certain effective procedure of your reverse osmosis system. If the pressure in your RO tank is not within the optimal array, you might come across problems such as reduced stress or no water circulation. Understanding exactly how to identify and correct these concerns can save you time and make sure clean, dependable water output.
A. Low Pressure
Reduced container stress often creates bad water shipment or an empty-feeling storage tank in spite of it being full. To diagnose and fix this, adhere to these key steps:
- Shut off the main water system to the RO system and open the tap to drain the container completely.
- Eliminate the cap to access the Schrader shutoff on the tank, normally discovered under a blue cap.
- Check the atmospheric pressure with a tire stress gauge. The optimal pre-charge pressure must be in between 5 to 7 psi. If you have a digital air stress scale, it will certainly provide the most precise analysis.
- If the pressure is below 5 psi or zero, make use of a bike pump to include air until the pressure reaches this optimum variety.
- If the storage tank feels hefty after draining pipes, it might still include water inside, showing the diaphragm can be endangered and the tank might require substitute.
Preserving right tank pre-charge stress is vital to protecting against overfilling or premature clearing of the tank. If pressure is expensive (above 7 psi), you should launch air gradually till it falls right into range. For additional pointers on how to appropriately pressurize an RO tank, get in touch with in-depth troubleshooting overviews.
B. No Water Flow
If your RO faucet creates no water despite a seemingly complete container, inspect the complying with usual reasons:
- Shutoff Placement: Make sure the storage tank valve is open (manage aligned with tubes).
- Storage tank Pressure: Make use of a tire scale to confirm the storage tank has actually the advised 5 to 7 psi air pressure.
- Blocked Filters: A stopped up post-filter can restrict water flow in spite of storage tank stress.
- Faulty Diaphragm: If the tank stress is existing but no water moves, the internal bladder might have ruptured.
- Improper Connection: Confirm that all tubes connections adapt installment requirements.
One practical check is to separate the tank tubing and see if water moves into a pail when the tank valve is open. If water flows right here however not at the tap, the problem might be with the faucet or post-filter clog.
Signs and symptom Possible Reason Solution Reduced or no water circulation Container pressure below 5 psi Add atmospheric pressure to 5-7 psi using a bicycle pump No water flow from faucet Closed container valve or clogged post-filter Open up valve totally; check and replace post-filter if blocked Tank feels heavy but no flow Burst diaphragm inside container Change the RO storage tank Stress too expensive (over 7 psi) Overinflated container bladder Launch excess atmospheric pressure gradually to 5-7 psi array By routinely examining the tank pre-charge and valve settings along with your filter problem, numerous typical problems with an RO system’s water shipment can be effectively solved. For a deeper dive right into testing RO system flow rates and diagnostics, browse through RO repairing resources.
“‘.

” Keeping your RO container’s air stress between 5 and 7 psi is like tuning a music tool accuracy makes sure consistency in water flow.”
XII. Final thought
“‘
Understanding Just how to pressurize an RO storage tank effectively is vital for keeping optimum water circulation and making certain the reliable efficiency of your reverse osmosis system. The entire procedure from preparing the system by closing off your supply of water and draining pipes the container, to thoroughly inspecting existing pressure levels and recognizing any type of stress issues plays a crucial duty in maintaining the durability and capability of your RO storage tank.
Using the appropriate devices needed, such as a bike pump and a tire stress gauge, while sticking to security preventative measures like avoiding overpressure or inappropriate use air compressors, assures a risk-free and successful pressurization process. Linking the pump to the storage tank, then adjusting the atmospheric pressure within the optimum PSI levels generally between 5 to 7 PSI for common containers is crucial to produce the ideal balance inside your RO system, allowing it to press cleansed water out properly.
After pressurizing, reconstructing the system appropriately by reconnecting lines and guaranteeing tight seals will certainly prevent leaks and preserve system honesty. Lastly, examining the system by checking water flow and stress ensures your RO container is working flawlessly and prepares to supply tidy water as needed.
Key takeaways for effectively pressurizing your RO container consist of:
- Constantly closed off the supply of water and completely drain the storage tank prior to trying pressurization.
- Utilize a reliable stress gauge to inspect the existing stress and determine if re-pressurization is needed.
- Apply air very carefully with a bike pump, intending for the perfect pressure series of 5 to 7 PSI to prevent system damages.
- Comply with safety and security precautions to stop overpressurizing and damaging the inner bladder of the storage tank.
- Reconstruct and test your system thoroughly to make sure no leakages and proper water circulation.
- Maintain a regular routine for checking and re-pressurizing your RO container to expand its life-span and keep water high quality.
By following these critical actions on how to pressurize an RO container effectively, you not just improve the performance of your reverse osmosis system however also protect a continuous supply of tidy, detoxified water for your office or home. Normal upkeep and punctual troubleshooting of typical concerns such as low stress or no water flow will certainly maintain your RO system running smoothly for several years ahead.
FAQ: Just how to pressurize an RO storage tank properly
What is the suggested stress range to pressurize an RO tank?
The ideal stress for reverse osmosis storage tanks is normally between 5 to 7 psi, with some sources recommending as much as 7 to 9 psi relying on storage tank size and kind. Pressurizing yet variety can disturb system equilibrium and lower performance.
Exactly how do I drain an RO container before pressurizing it?
To drain the tank, initially shut off the feed water shutoff and open the RO tap to allow all the water in the tank circulation out. Wait a few mins after draining pipes to ensure no water remains in the system lines before proceeding.
Just how can I examine the existing pressure inside the RO storage tank?
Remove the blue shutoff cap covering the Schrader shutoff on the container. Make use of a tire stress gauge or a low-pressure gauge by pushing it onto the shutoff to get an accurate stress analysis.
What devices do I require to pressurize an RO storage tank correctly?
Usually, you need a tire pressure gauge and either a bike pump or a low-pressure air pump. Stay clear of utilizing air compressors as they can quickly overpressurize and harm the container bladder.
How do I add air to the RO storage tank?
After fully draining pipes the storage tank, link your bike pump or air pump to the Schrader valve and slowly include air till the pressure gets to in between 5 and 7 psi. During pumping, keep the RO tap open to blurt any residual water over the bladder.
Why is it crucial to drain pipes the RO storage tank prior to pressurizing?
Draining removes water in addition to the bladder; if water remains, it can provide a false pressure analysis and lead to inappropriate pressurization, which affects the system efficiency and water flow.
How often should I pressurize or re-pressurize my RO storage tank?
It is recommended to inspect and, if needed, re-pressurize your RO container every 6 to year to keep optimal stress and system performance.
What takes place if the RO storage tank bladder is fractured?
If the bladder inside the tank ruptures, the container can not maintain correct stress, and it requires to be replaced to recover regular function.
Can I save the RO water when emptying the storage tank?
Yes, considering that the water is purified, you can collect the drained pipes water in tidy containers for various other uses like making coffee or watering plants.
What should I do after getting to the appropriate stress in the container?
Shut the Schrader shutoff cap, reconnect any disconnected water lines, close the RO faucet, and transform the feed water system back on to permit the storage tank to refill and pressurize the system appropriately.
Is it all right to over-pressurize the RO storage tank to improve water flow?
No, over-pressurizing can interfere with the tank’s balance, minimize the amount of water that fills up the bladder, and degrade system efficiency. Adhere to the recommended 5 7 psi range for finest results.
How can pressurizing the RO storage tank improve my water purification system?
A properly pressurized storage tank ensures the water stored is pressed out efficiently, boosting circulation rate at the faucet and overall RO system performance by balancing the air and water inside the tank.

Dr. Tina M. Nenoff is a senior scientist and Sandia Fellow at Sandia National Laboratories, renowned for her pioneering work in nanoporous materials. Her research focuses on the chemistry of confinement and reactivity of ions and molecules within these materials, leading to significant advancements in environmental remediation and energy applications. Notably, she played a crucial role in developing crystalline silicotitanates used to remove radioactive cesium from contaminated seawater following the Fukushima Daiichi nuclear disaster.
Tina NenoffDr. Tina M. Nenoff is a senior scientist and Sandia Fellow at Sandia National Laboratories, renowned for her pioneering work in nanoporous materials. Her research focuses on the chemistry of confinement and reactivity of ions and molecules within these materials, leading to significant advancements in environmental remediation and energy applications. Notably, she played a crucial role in developing crystalline silicotitanates used to remove radioactive cesium from contaminated seawater following the Fukushima Daiichi nuclear disaster.
Add A Comment